
Replacing LCD display on the iPhone 11 Pro
Technical difficulty
Duration of the procedure
Number of steps in the tutorial
In case that your screen of the iPhone 11 Pro is cracked, does not respond to touch, or does not display an image when the phone is turned on, you can use this guide to replace the display yourself.
The combined speaker + headphone sensor assembly attached to the back of the display is paired with your individual iPhone at the factory, so you need to transfer it from the old display to the new one whenever you replace the display. It contains a flood illuminator, which is part of the biometric security element Face ID. If the Face ID is damaged or replaced, it will stop working, so be careful not to damage any of these components during this procedure. In the event of damage, only Apple or an authorized Apple technician can restore Apple ID.
Note: True Tone is disabled after the screen is replaced, even when using the original Apple screen. In addition, your iPhone may temporarily display a ,,genuine" warning.
Step 1 Removing the pentalobe screws

Before starting, it is necessary to discharge the iPhone below 25% because a charged Li-ion battery can ignite or explode if accidentally cut.
- Turn off iPhone
- Unscrew the two 6.7mm long pentalob screws on the bottom edge of the iPhone using a Pentalobe screwdriver (Ph0001.2)
Opening iPhone will break its waterproof seal, so have a replacement seal ready before beginning this step. Without a new seal, your iPhone will not be waterproof.
Step 2 All cracks should be covered with tape
- Stick packing tape on the iPhone display until the entire display is covered.
- This keeps the glass shards stuck and ensures structural integrity when lifting the display.
Wear safety goggles to protect your eyes from any glass that will shake during repair.
Step 3 Opening 1

Warming the bottom edge of iPhone helps soften the screen protector and make it easier to open.
- Using a hair dryer or heat gun, heat the bottom edge of iPhone for about 3 minutes to reach about 80 ° C.
- Don’t put iPhone in the microwave !!!
Step 4 Opening 2

- Place the suction cups near the bottom edge of iPhone, one at the front and the other at the back, and gently push it into place.
- Hold your iPhone securely and use gentle suction cups to separate the screen from the back of the phone.
- After separating the display approx. 3 mm from the back, insert the Fixservis card into the gap.
The glue that holds the display in place is very strong, so creating this initial gap requires considerable force. If you have difficulty, reheat the bottom edge and gently slide the screen up and down repeatedly to weaken the glue until you create a gap to insert the Fixservis card.
Step 5 Opening 3
- Slide the Fixservis card around the lower left corner and up the left edge to release the glue holding the display.
- Repeat the same around the right free corner and up the right edge.
Do not insert the card too deeply to avoid damaging the internal components of iPhone.
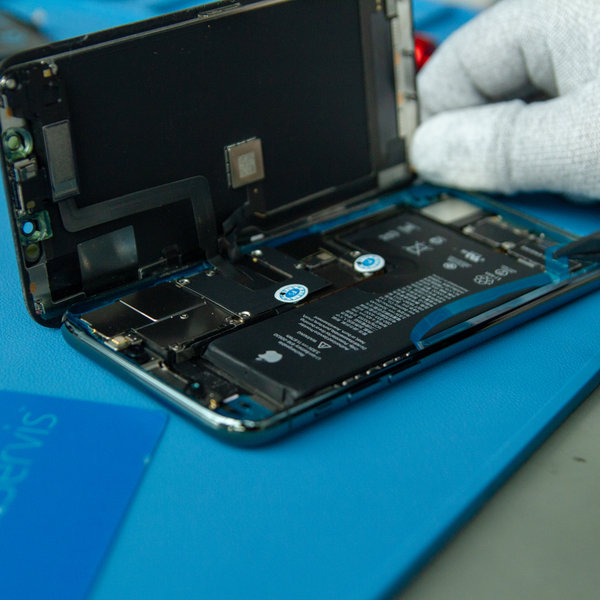
Step 6 Opening 4
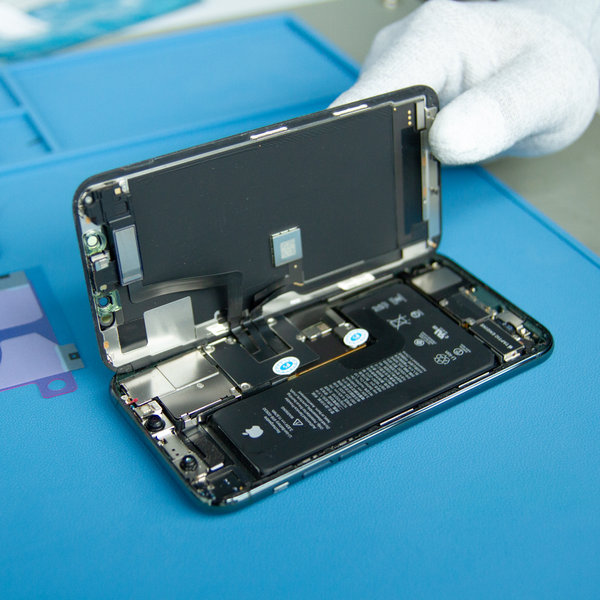
- You can remove the suction cups after successfully releasing the glue from the edges.
- Open iPhone by turning the display to the left.
- We recommend that you support the display so that you do not tear off the flat cable that holds the display from the system board.
For now, don't try to completely detach the display, as a few fragile flat cables still connect it to the iPhone's logic board.
Step 7 Unscrew the battery connector cover
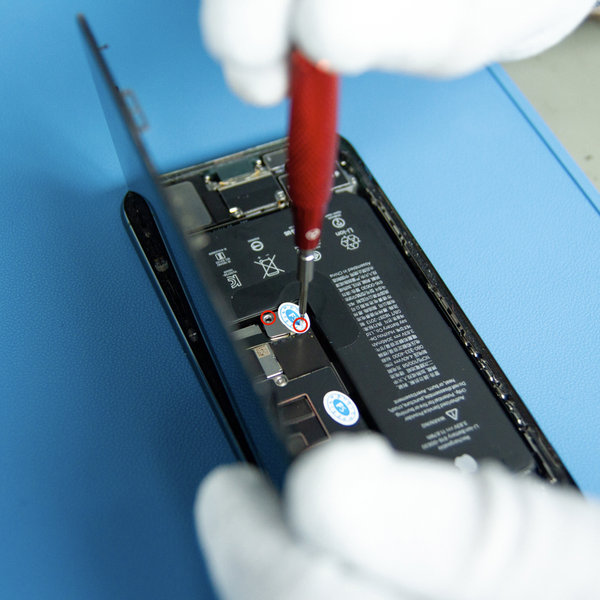
- Unscrew the two 1.3 mm long screws securing the battery cover bracket and remove it at the same time.
Throughout the repair, follow each screw to make sure it returns exactly where it came from to avoid damaging your iPhone.
Step 8 Disconnecting of the battery
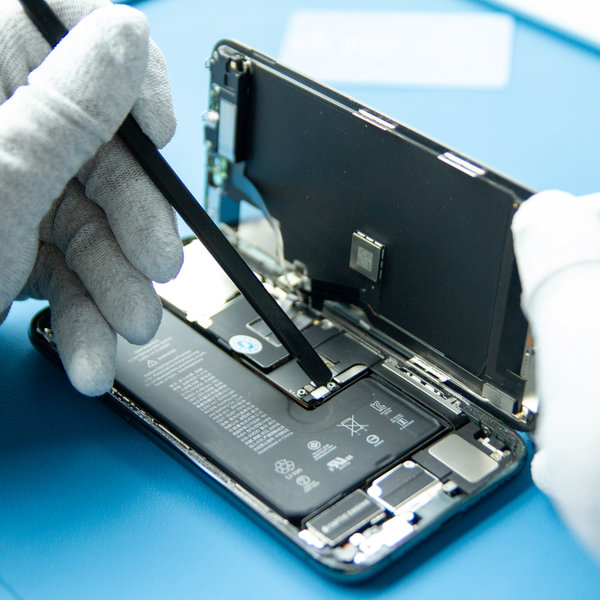
- Use the tip of the Spudger to disconnect the battery connector on the system board from the system board.
Try not to damage the black silicone seal surrounding this and other board connections. These seals provide exceptional protection against the ingress of water and dust.
- Bend the connector slightly away from the system board to prevent accidental contact with the outlet and power to the phone during repair.
Step 9 Removing the System Board Cover
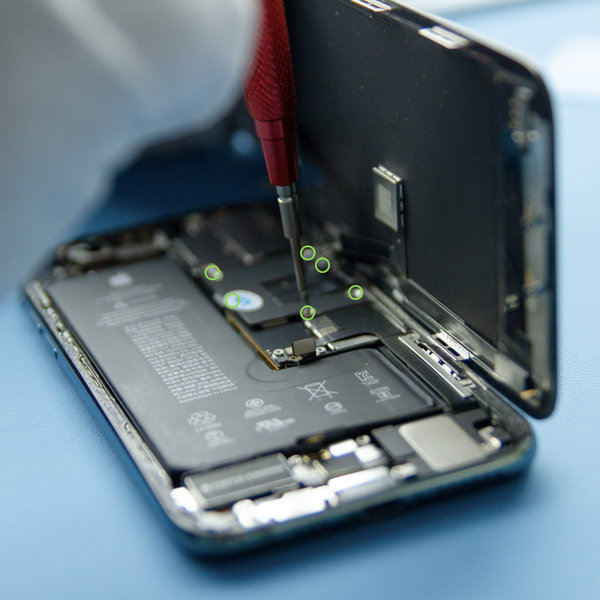
- Using a Pentalobe screwdriver, unscrew the six 1.3 mm screws securing the logic board cover bracket, and then remove it.
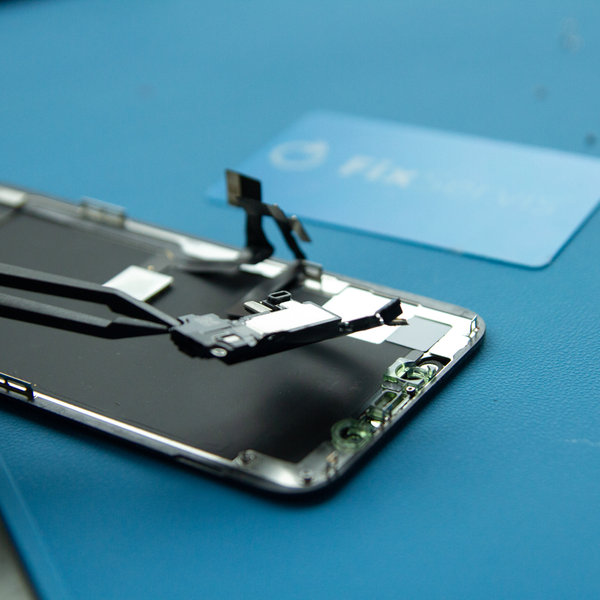
Step 10 Disconnect the OLED + front sensor and digitizer display
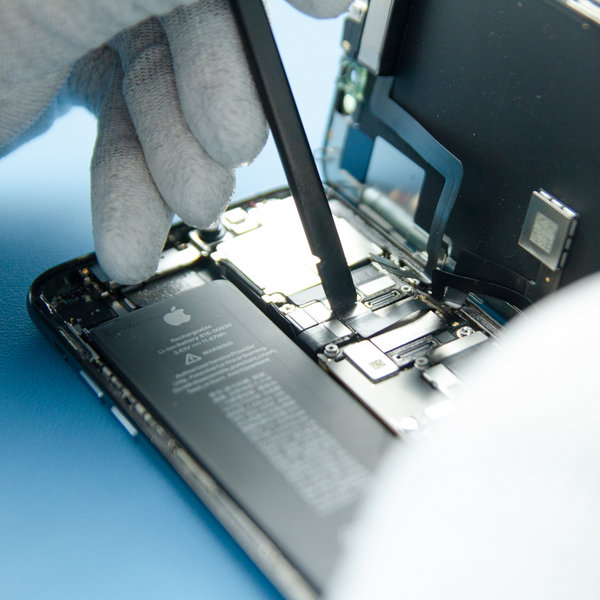
- Disconnect the OLED panel cable connector, front sensor, and digitizer using the Spudger.
Step 11 Remove the display assembly
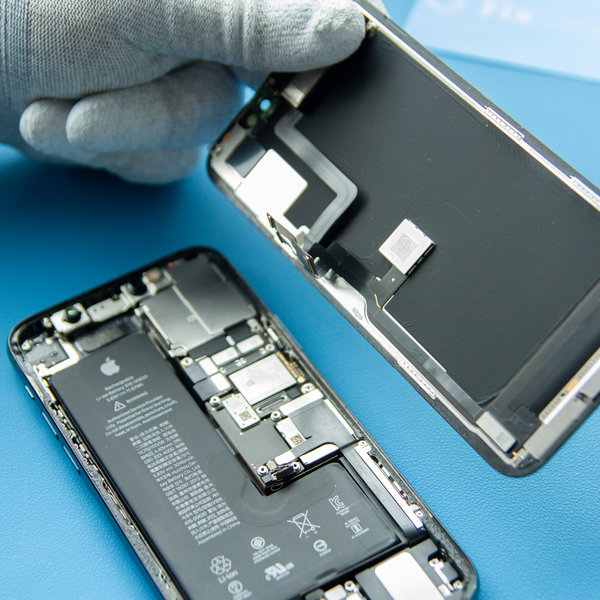
- Remove the display from the system board.
Step 12 Unscrew the front assembly
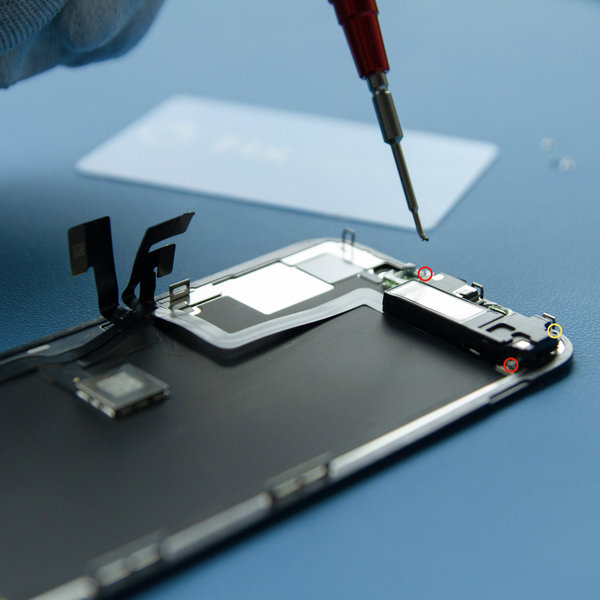
- Using a Pentalobe screwdriver, remove the three screws that secure the speaker / sensor assembly to the back of the display:
- two 1.3 mm long.
- one 1.9 mm long.
Step 13 Flip the speaker assembly over
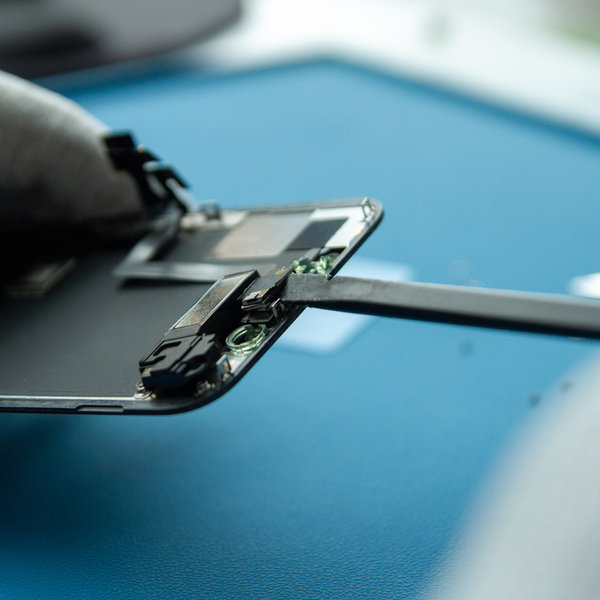
- The headphone speaker is slightly stuck in place.
- Using the tip of the Spudger, gently pry the top edge of the speaker.
- Flip the speaker assembly down - down and from the top of the display.
The speaker remains attached with a very thin flat cable. Be careful not to strain or damage the cable.
Step 14 Separate the light sensor
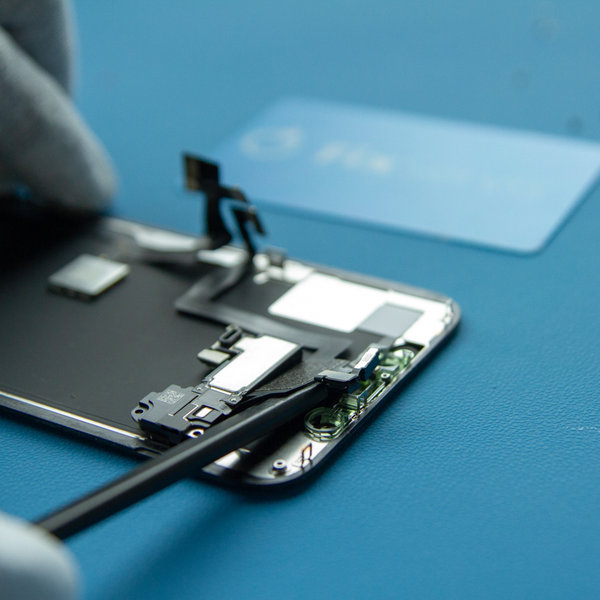
- Use the Spudger to separate the light sensor and remove it from the notch on the display.
Step 15 Remove the speaker + front sensor assembly
- Remove the headphone speaker and front sensor assembly.
Step 16 Install a new LCD display
- Install the speaker + front sensor assembly on the new LCD display.
To reinstall, follow these instructions in reverse order.

Going Green
We are constantly improving our carbon footprint to protect our planet. Read more about how we are adapting our processes to reduce our footprint.