
Battery replacement of iPhone 14 Pro
Technical difficulty
Duration of the procedure
Number of steps in the tutorial
iPhone batteries retain 80% capacity for about 500 charges, or 18-24 months for average use. Post this period, iPhones charge more often and may slow down, as indicated by iOS. Follow this guide to replace the battery and boost performance.
Important information before replacing the battery
1. Drain the iPhone to below 25% as a fully charged Li-ion battery can catch fire or explode if its protective layers are accidentally breached.
2. Opening your iPhone will breach its water-resistant seal, so have a replacement seal ready before starting this step. Without a new seal, your iPhone will not be water-resistant, and there's a higher likelihood of dust or moisture ingress.
3. Wear protective glasses to prevent eye injury during the repair.
4. Organize screws during the repair to prevent mixing them up, which could lead to damage to the iPhone by using the wrong screw in a thread.
5. After replacing the battery, a message "Important Message" will be displayed on the screen.
- The message simply informs that the original battery has been replaced with a new one.
- The message has no impact on the device's performance.
- It appears on the lock screen for 4 days, then in the settings.
This is caused by the battery replacement not being authorized by Apple's official software, and the part was not paired with the motherboard.
Apple trying to achieve to ensure that users have their devices repaired at authorized service centers, which use original Apple parts, accessories, and software.
Tips for Getting Started
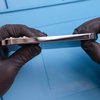
Highlight 3 mm on the opening pick or card.
Do not insert the opening pick or card more than 3 mm, as you could damage internal components.
If your iPhone's display is cracked, cover it with adhesive tape to prevent injuries during the repair.
If you are unable to attach the suction cup in the following steps, use a strong piece of tape (such as duct tape) and lift the screen.
Do not put your iPhone in the microwave!!
Required Tools
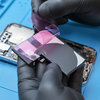
- New battery for iPhone 14 Pro
- Heat pad
- Tool kit
- Heat gun
- Suction cups / securing tool
- Card
- Spudger
- Tweezers
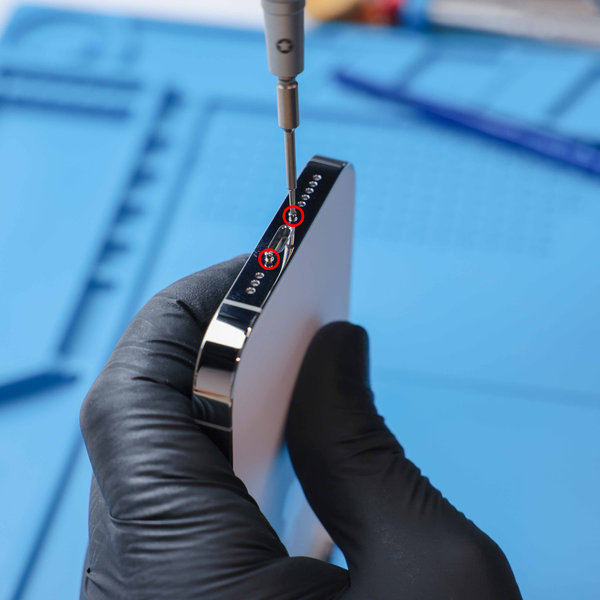
Step 1 Remove the bottom pentalobe screws
Be cautious of liquid exposure when opening the iPhone’s display. Ensure that replacement seals are ready before proceeding.
1. Turn off your iPhone before beginning disassembly and tape over any cracks.
2. Remove the two 6.8 mm-long pentalobe P2 screws at the bottom edge of the iPhone.
Step 2 Display Disassembly

A) Heating the phone
- It is recommended to wear protective ESD gloves.
- Using a hair dryer or heat gun, heat the entire perimeter of the display for about 3 minutes to reach a temperature of approximately 80°C (176°F), or until it becomes difficult to keep your hand on the phone due to the high temperature.
Heating the phone helps to soften the adhesive between the display and the phone frame, making it easier to open.
Along the left edge of the iPhone are flex cables. Do not insert the opening pick or card into this side!
B) Opening the display
The display can be opened in two different ways: The first method is using a suction cup, and the second method is using a securing tool, which is safer.
In this guide, we will proceed using a suction cup.
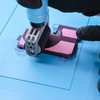
Placement of the suction cup
- Place the suction cups near the bottom edge of the iPhone, one on the front and the other on the back, and gently press down on the spot.
If using a single suction cup, attach it to the bottom edge of the phone, avoiding the edge of the glass itself.
- Securely hold your iPhone and with firm, steady pressure, pull on the suction cup to create a slight gap between the frame and the display.
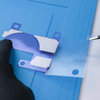
- After separating the display about 3 mm from the frame, insert a opening pick or card into the gap.
The adhesive holding the display in place is very strong. Therefore, creating this initial gap requires considerable force. If you encounter difficulty, reheat the bottom edge and gently slide the display up and down repeatedly to weaken the adhesive until you create a gap large enough to insert the card.
C) Heating the right edge
- Using a hair dryer or heat gun, apply heat the right edge of the iPhone (the edge with the power button) for 90 seconds or until the screen becomes too hot to touch.
D) Separating the adhesive (right side of the iPhone)
- Slide the opening pick or card from the bottom right corner up to the top right corner, separating the adhesive.
Do not insert the opening pick or card more than 3 mm, as you could damage internal components.
Before proceeding, leave the opening pick or card in the top right corner.
- Using a hair dryer or heat gun, heat the top edge of the iPhone for 90 seconds or until the screen becomes too hot to touch.
- Slide the opening pick or card around the top right corner of the iPhone to separate the top adhesive
Before proceeding, leave the opening pick or card in the top left corner.
E) Heating the left edge
- Using a hair dryer or heat gun, heat the left edge of the iPhone for 90 seconds or until the screen becomes too hot to touch.
F) Separating the adhesive (left side of the iPhone)
- Insert the second opening pick or card into the bottom left corner of the iPhone.
- Slide the opening pick or card along the entire edge until the clips holding the display release. Be very careful of the flex cables located on this side of the display.
If you have difficulty separating the adhesive, reheat the left edge
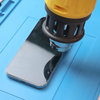
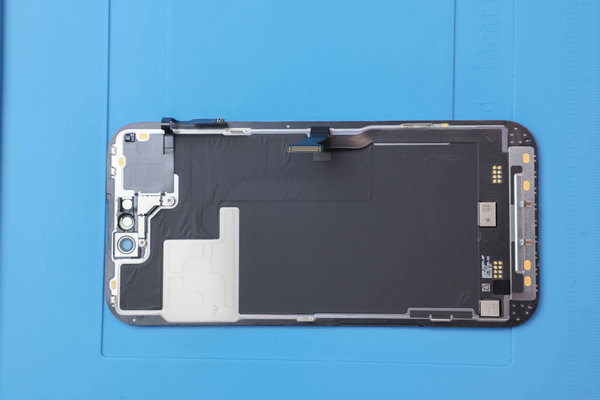
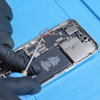
Step 3 Open the iPhone
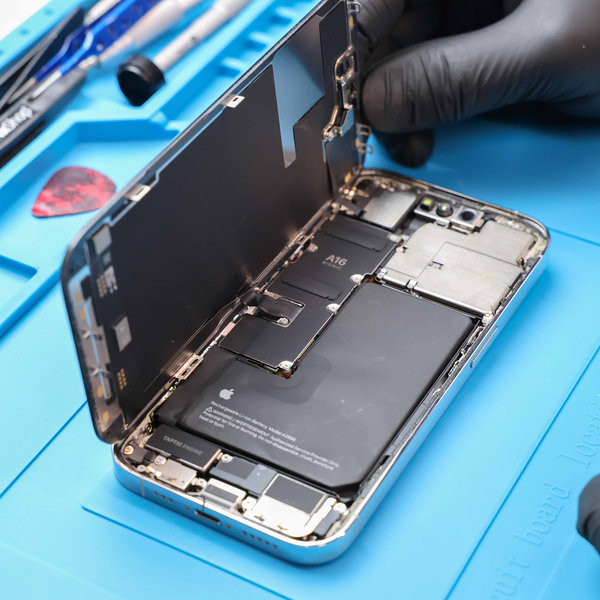
a. Detach the suction handle from the screen.
b. Turn your iPhone so the right edge faces you. Open your iPhone by lifting the screen from the right side, like opening a book cover.
c. Prop the screen against a stable object to keep it upright while you work on the phone.
d. When reassembling, place the screen in position and align the clips along the top edge. Gently press the top edge into place before securing the rest of the screen.
e. If it doesn't click smoothly into place, inspect the clips around the screen's perimeter to make sure they aren't bent
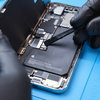
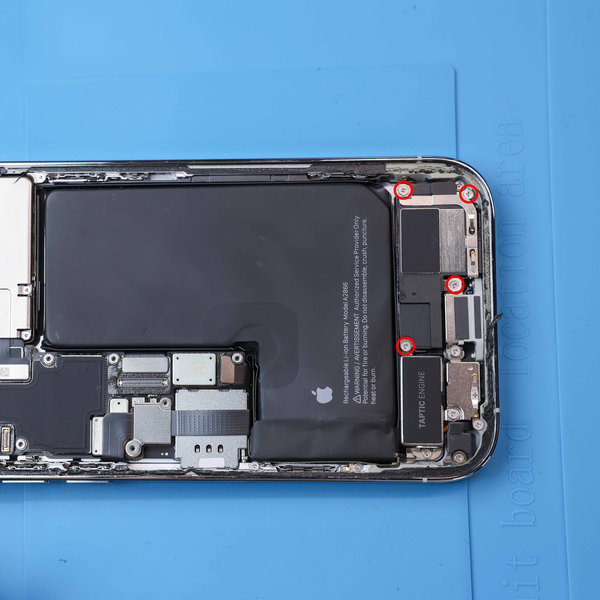
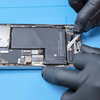
Step 4 Unfasten the display and battery connector cover screws

a. Use a Y000 screwdriver to remove the 8 screws securing the battery connector covers.
Five 1.3 mm-long screws
Two 1.6 mm-long screw
One 1.9 mm-long screw
b. At this stage of reassembly, it's advisable to power on your iPhone and test all functions before sealing the screen.
c. Ensure you power it down completely before resuming work.
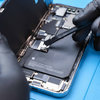
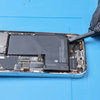
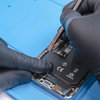
Step 5 Remove the battery connector cover
a. Grasp the connector cover with a pair of tweezers and slide it down carefully to remove it.
Step 6 Disconnect the battery
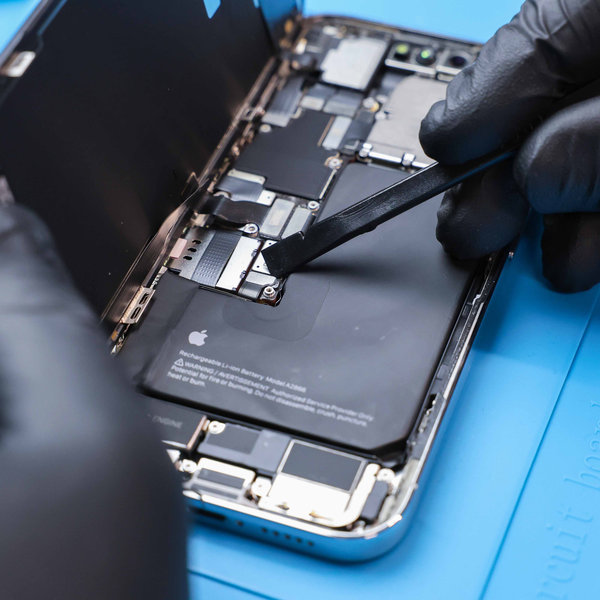
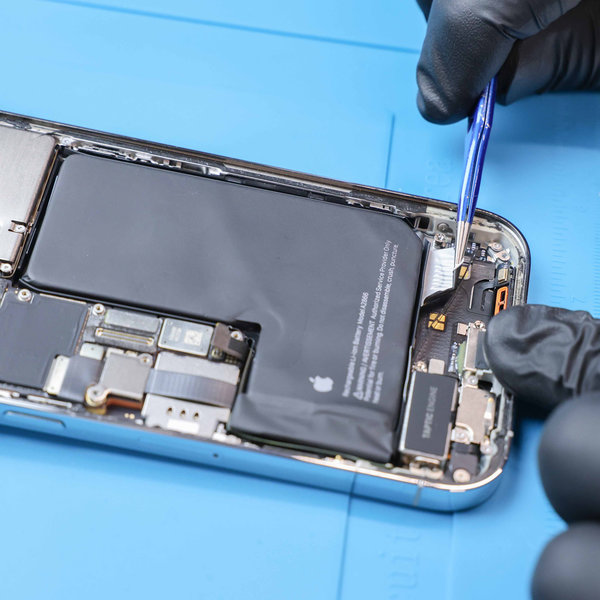
a. Use the pointed end of a spudger to disconnect the battery cable by gently prying the connector straight up from its socket.
b. Avoid damaging the black silicone seal surrounding this and other board connections, as these seals offer extra protection against water and dust.
c. Bend the connector slightly away from the logic board to prevent it from accidentally reconnecting and powering the phone during your repair.
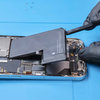
Step 7 Disconnect the display cables


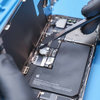
a. Use the pointed end of a spudger to disconnect the first display cable by prying the connector straight up from its socket.
b. Repeat the process with the other one.
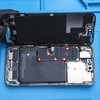
Step 8 Remove the screen
a. After cleaning the area with isopropyl alcohol, apply a new adhesive.
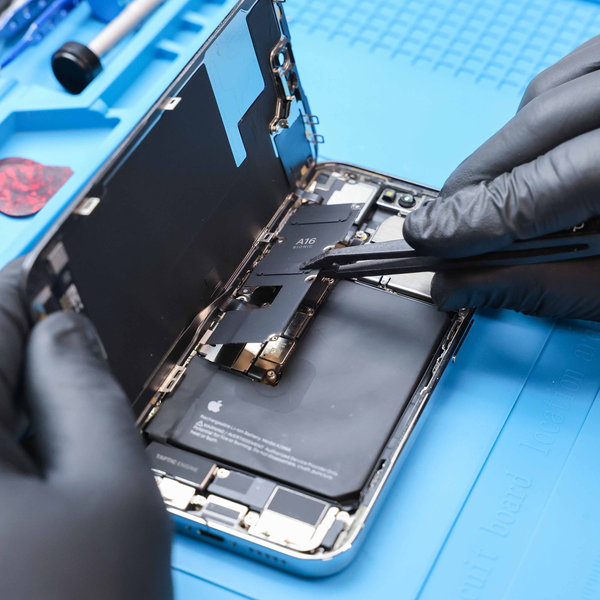
Step 9 Unfasten and loosen the loudspeaker screws and remove the loudspeaker

a. Remove the four 1.5 mm-long screws securing the loudspeaker.
b. Use the flat end of a spudger to pry up and loosen the loudspeaker from the device.
c. Grab the loudspeaker using a pair of tweezers.
Step 10 Transfer the adhesive-backed strip


a. If your new part does not include the plastic strip on the top of the Taptic Engine, you will need to move it to your replacement part.
b. Carefully peel the adhesive-backed strip off the Taptic Engine using your fingers or a pair of tweezers.
Step 11 Locate the adhesive pull-tabs

a. The battery is secured to the rear case with three stretch-release adhesive strips: two on the bottom edge and one on the top edge.
b. Each strip has a black pull-tab attached lightly to the battery edge.
c. In the next steps, you'll pull each tab to gradually stretch the adhesive beneath the battery. These adhesive strips, similar to command strips, lose their stickiness when stretched, allowing for easy removal of the battery.
d. If any strips break, remain calm—they may not always function perfectly. Continue reading for guidance on handling broken strips.
Step 12 Remove the stretch release adhesive


a. Hold the phone steady by its sides.
b. Grab the first pull-tab with your finger or use a spudger and slowly pull it downwards from the battery.
c. Be careful, as you are now close to the battery and any damage to it might leak dangerous chemicals or even cause an explosion, so do not press on the battery or jab it with any tools.
d. Keep the pull-tab strip flat and unwrinkled and at a low angle. Be patient, as it might take some time to stretch.
e. Grab the second pull-tab strip and repeat the procedure.
f. If any of the adhesive strips break off underneath the battery and cannot be retrieved, use a pair of tweezers and an opening pick to peel it up.
g. Very slowly pull on it.
h. If you have not been successful, the battery is stuck but again, do not panic.
i. Use a few drops of isopropyl alcohol around the broken adhesive strips and wait a while for it to weaken the adhesive.
j. After that, use the flat end of a spudger to lift the battery
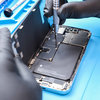
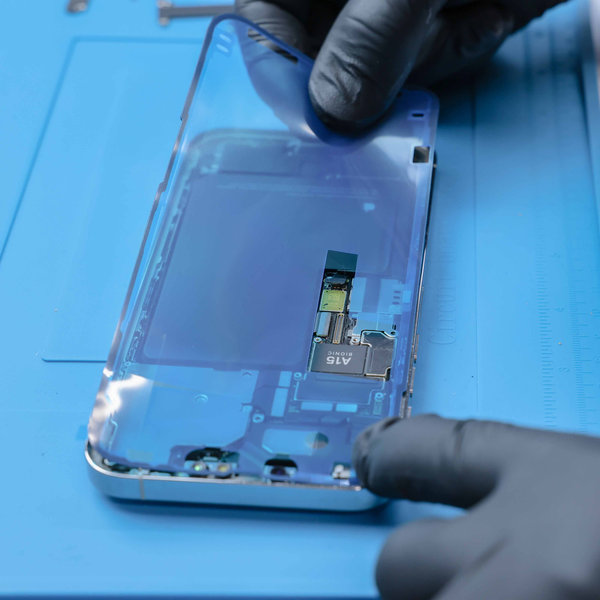
Step 13 Remove the battery

a. After removing the battery, check whether there is any alcohol solution left in the phone and wipe it dry before installing your new battery.
b. Under no circumstances install a damaged or deformed battery.
c. Perform a force start after reassembly.
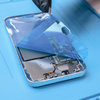
Step 14 Applying the new battery into its compartment
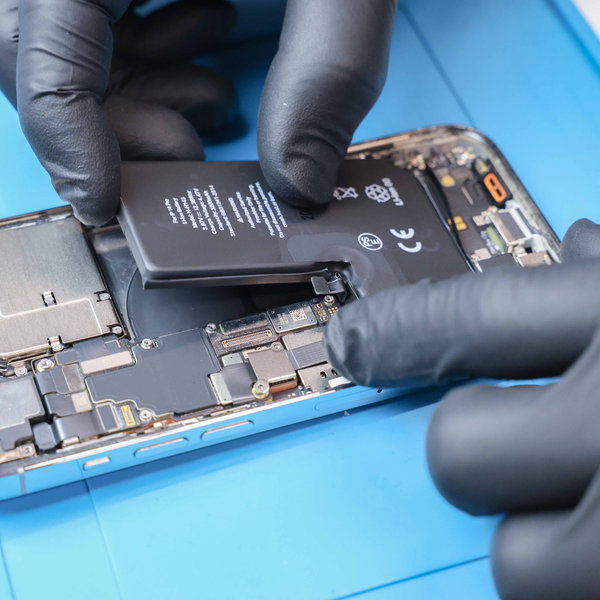
- Gently remove the remaining piece of film to fully expose the side of the battery adhesive that sticks to the battery compartment.
- Place the battery into its compartment and lightly press it into the device.
- Connect the battery cable to its socket on the logic board.
It is advised to test your repair at this point with the new battery in place, while the phone’s rear glass isn’t sealed yet.
Temporarily reconnect all the rear glass components, turn on your phone and make sure it functions without any issues.
Turn it off again, disconnect the rear glass components and continue reassembly.
Step 15 Removing the old adhesive around the edges of the iPhone

- Remove all the old adhesive around the perimeter of your iPhone's case using a spudger or tweezers.
Be sure to remove any remaining smaller bits of adhesive with the tip of your spudger.
Step 16 Applying new adhesive around the edges of the frame


-
Reconnect all the phone’s components to the rear glass through a reverse process and apply the new adhesive around the edges of the iPhone.
The new adhesive will ensure the iPhone's resistance to water and dust.
Before placing the rear glass on the iPhone, make sure to remove the protective foil.
Be precise while applying the new adhesive. Improper installation could lead to your iPhone not being water-resistant, and there's a higher likelihood of dust or moisture ingress.
Step 17 Reassembling the iPhone


- Install back the speaker assembly and display.
Check the phone for excess screws and small parts that may be stuck in the body of phone and remove them.
- When reassembling the iPhone back to its original state, follow these instructions in reverse order.
After reassembly, perform a forced restart. This may help prevent any possible issues.

Going Green
We are constantly improving our carbon footprint to protect our planet. Read more about how we are adapting our processes to reduce our footprint.