
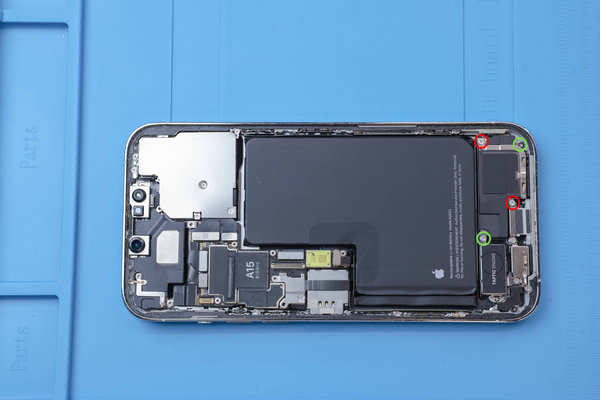
Battery replacement of iPhone 13 Pro Max
Technical difficulty
Duration of the procedure
Number of steps in the tutorial
iPhone batteries retain 80% capacity for about 500 charges, or 18-24 months for average use. Post this period, iPhones charge more often and may slow down, as indicated by iOS. Follow this guide to replace the battery and boost performance.
Important information before replacing the display
1. Drain the iPhone to below 25% as a fully charged Li-ion battery can catch fire or explode if its protective layers are accidentally breached.
2. If Face ID is damaged or replaced, it will stop working, so be careful not to damage any of these components during this procedure. In case of damage, only Apple or an Apple authorized technician can restore the Apple ID function.
3. Opening your iPhone will breach its water-resistant seal, so have a replacement seal ready before starting this replacement procedure. Without a new seal, your iPhone will not be water-resistant, and there's a higher likelihood of dust or moisture ingress.
4. Wear protective glasses to prevent eye injury during the repair.
5. Organize screws during the repair to prevent mixing them up, which could lead to damage to the iPhone by using the wrong screw in a thread.
6. After replacing the battery, a message "Important Message" will be displayed on the screen.
-
- The message simply informs that the original display has been replaced with a new one.
-
- The message has no impact on the device's performance.
-
- It appears on the lock screen for 4 days, then in the settings.
The message simply informs that the original battery has been replaced with a new one.
It has no impact on the device's performance.
It appears on the lock screen for 4 days, then in the settings.
Apple trying to achieve to ensure that users have their devices repaired at authorized service centers, which use original Apple parts, accessories, and software.
Tips for Getting Started
Highlight 3 mm on the openning pick or card.
Do not insert the openning pick or card more than 3 mm, as you could damage internal components.
If your iPhone's display is cracked, cover it with adhesive tape to prevent injuries during the repair.
If you are unable to attach the suction cup in the following steps, use a strong piece of tape (such as duct tape) and lift the screen.
Do not put your iPhone in the microwave!!
Required Tools
- New battery for iPhone 13 Pro Max
- Heat pad
- Tool kit
- Heat gun
- Suction cups / securing tool
- Card
- Spudger
- Tweezers
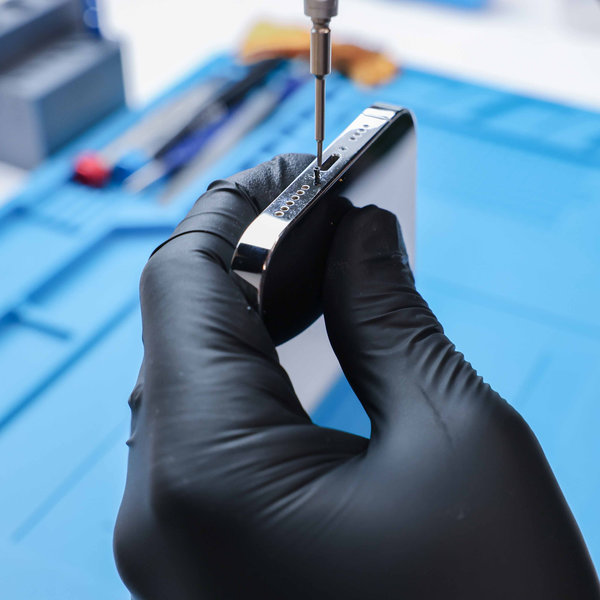
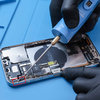
Step 1 Unscrewing the bottom pentalobe screws
Before starting, it is necessary to discharge the iPhone below 25% because a charged Li-ion battery can ignite or explode if accidentally cut.
- Turn off the iPhone
- On the bottom edge of the iPhone, unscrew two 6.8 mm long pentalobe screws using a Pentalobe PL1 (0.8 mm) screwdriver.
Opening iPhone will break its waterproof seal, so have a replacement seal ready before beginning this step. Without a new seal, your iPhone will not be waterproof.
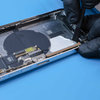
Step 2 Display Disassembly
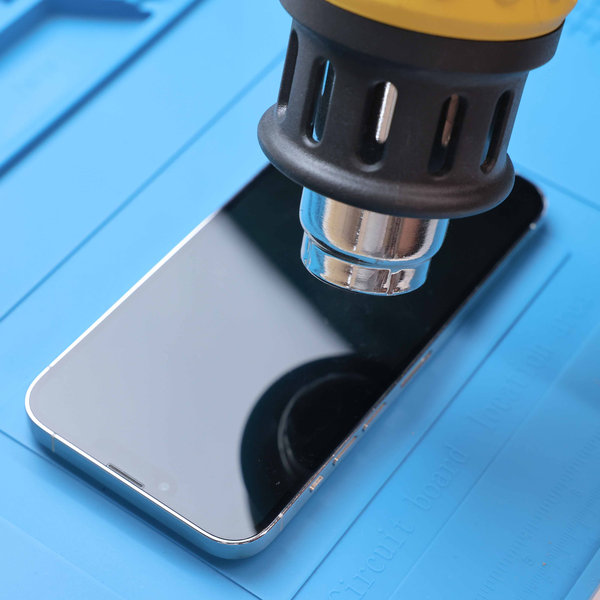
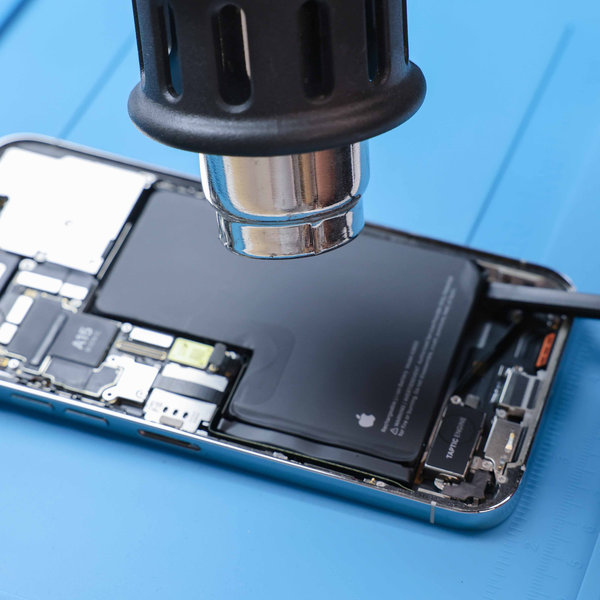
A) Heating the phone
- It is recommended to wear protective ESD gloves.
- Using a heat gun or a hair dryer, heat entire bottom side of the iPhone for about 2 minutes to reach a temperature of approximately 80°C (176°F), or until it becomes difficult to keep your hand on the phone due to the high temperature.
Heating the phone up helps to soften the adhesive between the display and the phone frame, making it easier to open.
Note: There are two fragile cables linking the screen to the phone: one positioned slightly above the mute switch, and the other located approximately halfway between the volume down button and the bottom edge of the phone.
There are several spring contacts located around the phone's perimeter.
Exercise caution to avoid inserting your openning pick deeper than recommended in these areas to prevent bending these contacts.
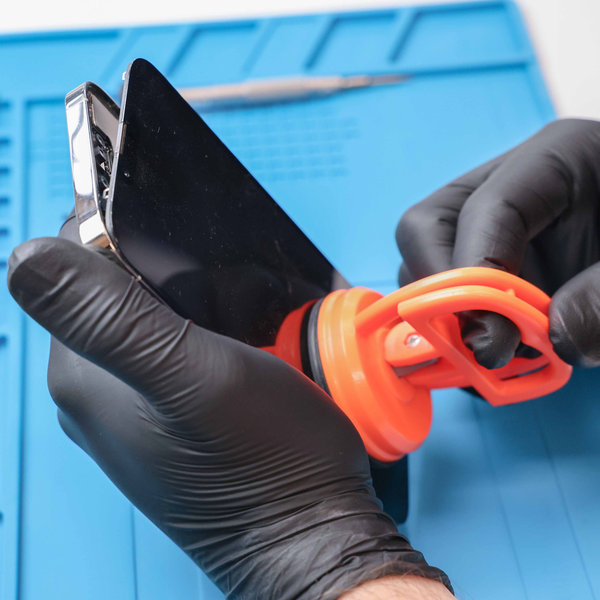
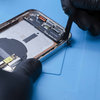
B) Opening the display
The display can be opened in two different ways: The first method is using a suction cup, and the second method is using a securing tool, which is safer.
In this guide, we will proceed using a suction cup.
Placement of the suction cup.
Attach the suction cup to the bottom edge of the phone, avoiding the edge of the glass itself. Securely hold your iPhone and with firm, steady pressure, pull on the suction cup to create a slight gap between the frame and the display.
If using a single suction cup, attach it to the bottom edge of the phone, avoiding the edge of the glass itself.
Securely hold your iPhone and with firm, steady pressure, pull on the suction cup to create a slight gap between the frame and the display.
After separating the display about 3 mm from the frame, insert a openning pick or card into the gap.
The adhesive holding the display in place is very strong. Therefore, creating this initial gap requires considerable force. If you encounter difficulty, reheat the bottom edge and gently slide the display up and down repeatedly to weaken the adhesive until you create a gap large enough to insert the card.
Move your openning pick in a back-and-forth motion along the lower edge to loosen the adhesive.
Keep your openning pick in place in the bottom right corner to prevent the adhesive from resealing.
C) Heating the right edge
Using a heat gun or a hair dryer, heat the right edge of the iPhone (the edge with the power button) for 90 seconds or until the display becomes too hot to touch.
D) Releasing the right clip and separating the adhesive (right side of the iPhone)
Avoid inserting your openning pick more than 5 mm deep along the right edge.
Gently maneuver your opening tool around the lower right corner of the screen and toward the power button until you encounter resistance from a clip securing the screen.
Adjust the orientation of your openning pick so that the flat edge is positioned beneath the screen.
Rotate the openning pick to widen the space between the screen and the frame until the right clip disengages.
Introduce a second opening openning pick to the right of the initial one.
Move the first openning pick back to the bottom right corner of the screen.
Glide the second openning pick to the top right corner of the screen to loosen the adhesive.
Leave these openning picks in place to prevent the adhesive from sealing again.
Exercise caution and avoid inserting the openning pick or card more than 3 mm to prevent any potential damage to internal components.
Before proceeding, leave the openning pick or card in the top right corner.
E) Heating up the top edge
Using a heat gun or a hair dryer, heat the top edge of the iPhone for 90 seconds or until the screen becomes too hot to touch.
F) Separating the adhesive and releasing the top left clip
Insert a third opening pick in the top right corner, just above the previous openning pick.
Do not insert the openning pick or card more than 3 mm along the top edge, as you could damage internal components.
Guide your openning pick around the upper right corner and along the top edge to disengage the two clips and adhesive holding it in place.
Rotate your openning pick so its flat edge is under the screen.
Twist your openning pick to release the top left screen clip.
Slide your openning pick to the top left corner.
G) Heating up the left edge
Using a heat gun or a hair dryer, heat the left edge of the iPhone for 90 seconds or until the display becomes too hot to touch.
H) Releasing the left clips and separating the adhesive (left side of the iPhone)
Exercise caution not to insert your openning pick more than 2 mm deep along the left edge to prevent damage to the two cables linking the screen to the phone.
Rotate your openning pick around the upper left corner of the screen.
Guide your openning pick toward the bottom left corner of the screen to loosen the adhesive.
If you have difficulty separating the adhesive, reheat the left edge.
Step 3 Opening the iPhone

Carefully open the screen to the left side of the phone.
If the screen appears to be stuck, revisit the edges to ensure no sections of adhesive or clips are overlooked.
Support the screen against a box or similar object to prevent strain on the cables.
Do not attempt to fully detach the screen yet, as several fragile flat flex cables still connect it to the iPhone's motherboard.
Warning: If the battery is damaged stop the repair. Do not put yourself in danger.
When reassembling the iPhone to its original state, place the display in position. Align the clips along the top edge and before snapping the rest of the display into place, gently press the top edge into position. If it doesn't snap into place easily, check the condition of the clips around the perimeter of the screen and ensure they are not bent.
Step 4 Removing the battery connector cover
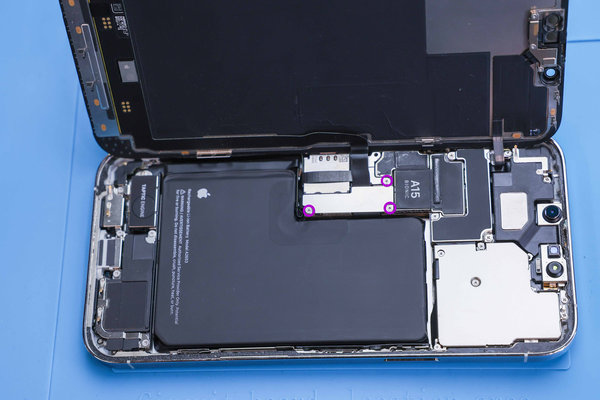
Utilize a Y000 tri-point screwdriver to loosen the screws holding the battery cover in place:
Three screws measuring 1.3 mm in lenght
Use tweezers or fingernail to lift the cover and remove it.
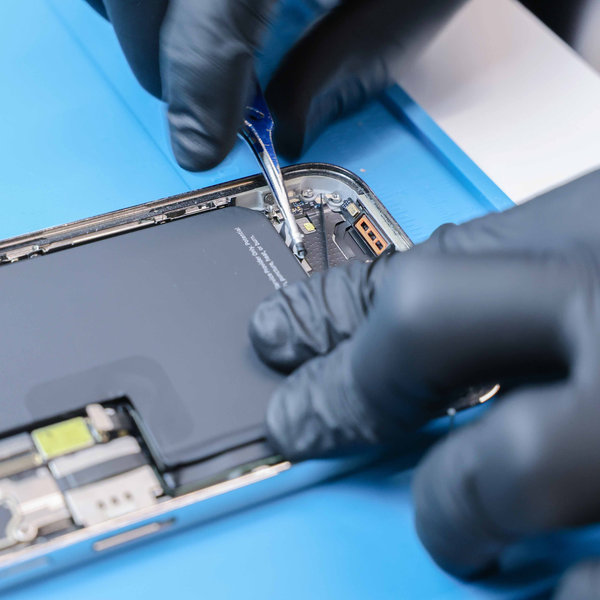
Step 5 Unpluging the battery

Employ the pointed end of an spudger to lift and detach the battery press connector.
When reattaching a press connector, align it with its socket and carefully press down on one side until it clicks into position, then repeat the process for the other side. Ensure it sits flush, as the insulating rubber around the sockets may hinder a complete connection.
When reassembling phone this is a good time to test your new display if it works correctly before sealing the phone again.
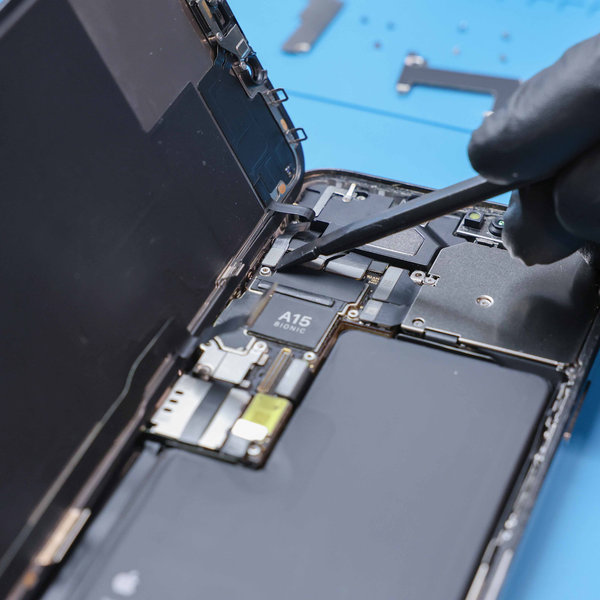
Step 6 Disconnecting display cables

- Utilize the sharp tip of a spudger to gently lift and disconnect the press connector for display.
Step 7 Dismounting the front sensor connector cover
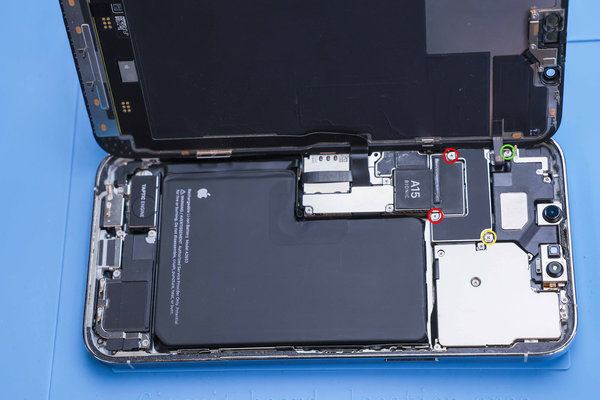
Use a Y000 screwdriver to take out the two 1.1 mm screws securing the cover.
Next, use a Phillips screwdriver to remove the remaining two screws from the front sensor connector cover:
- One 1.5 mm screw
- One 1.8 mm screw
Use tweezers to take out the front sensor connector cover.
Step 8 Disconnecting the front sensor connector
- Utilize the pointed tip of a spudger to disconnect the front sensor assembly cable connector
Step 9 Disassembling the display
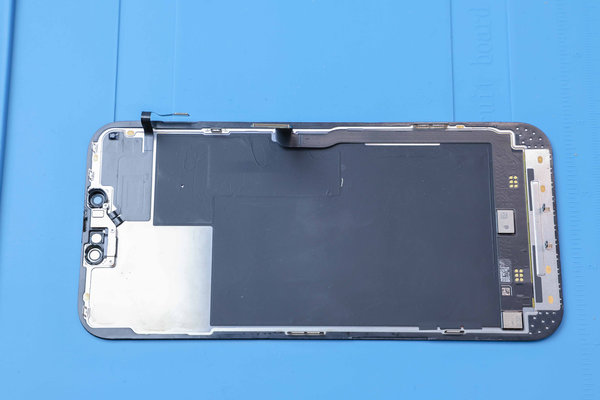
Remove the display and place it on a clean, straight surface.
Warning: Do not touch the TrueDepth camera, grounding springs or near parts.
Exercise caution to avoid causing harm to any of the spring contacts while cleaning the frame.
Step 10 Unscrewing the loudspeaker
Use a Phillips screwdriver to take out the four 1.5 mm screws:
- Two screws with small heads
- Two screws with a large heads
Step 11 Taking out the loudspeaker
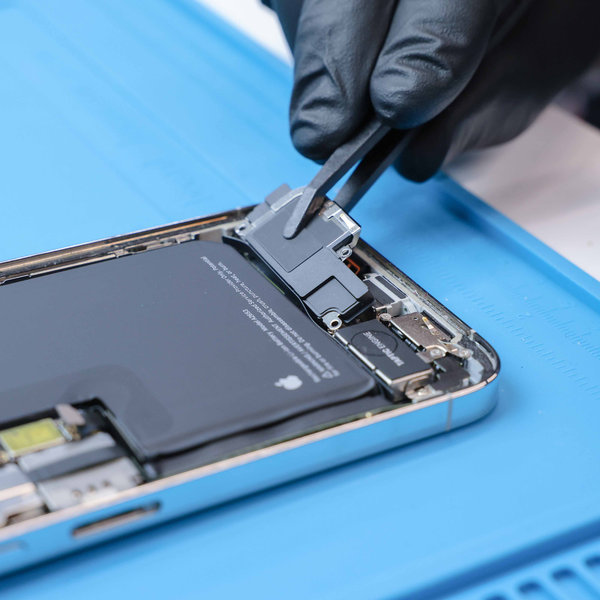
Use a tweezers to grip the loudspeaker.
Gently tilt the loudspeaker to release it from the adhesive-backed strip connected to the Taptic Engine.
Remove the loudspeaker completely.
When reinstalling, position the loudspeaker by placing the battery-side into its recess first, ensuring it aligns with the adhesive-backed strip.
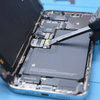
Step 12 Locating the adhesive pull-tabs
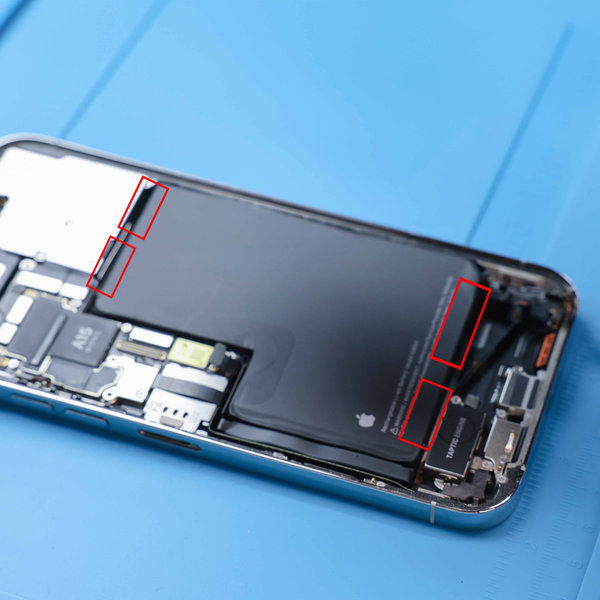
Four stretch-release adhesive strips hold the battery in place against the rear case - two at the bottom edge and two at the top edge of the battery.
Each strip has a black pull-tab at the end, which is lightly stuck to the edge of the battery.
In the following steps, you’ll pull each tab to slowly stretch the adhesive underneath the battery.
These "command-strip" style adhesives lose their adhesion when stretched, allowing for easy battery removal.
If the strips happen to break, don't worry! This is a common occurrence. Continue reading for tips on how to deal with broken strips.
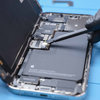
Step 13 Peel off the stretch-release adhesive
Pull one of the adhesive pull tabs out from under the battery until you can grip it with tweezers your fingers or wrap it around your tool.
Keep the phone stable by holding onto the edges of the frame - avoid pressing down on the battery.
Pull the strip slowly, evenly, and at a shallow angle without dragging it across other components.
Continue pulling, re-gripping, or wrapping it around your tool as needed until the strip fully releases from under the battery.
If the strip breaks, try to retrieve it. If you cannot grip it from under the battery, proceed to the next step.
Repeat this process for the remaining three adhesive strips.
Step 14 Alternative procedure for removing the battery
If you have successfully removed all four stretch-release adhesive strips, you can now proceed to remove the battery!
If not, you can try to heat the battery a little to soften the adhesive.
If this doesn't help, follow the next steps to dissolve the adhesive using isopropyl alcohol and a plastic card.
If one of the top adhesive strip remains, lift the top edge of the phone.
If either of the bottom adhesive strips remains, lift the left edge of the phone (where the volume buttons are located).
Apply a few drops of highly concentrated isopropyl alcohol (at least 90%) along the raised edge of the battery.
Allow one minute for the isopropyl alcohol to seep under the battery and soften the adhesive.
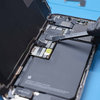
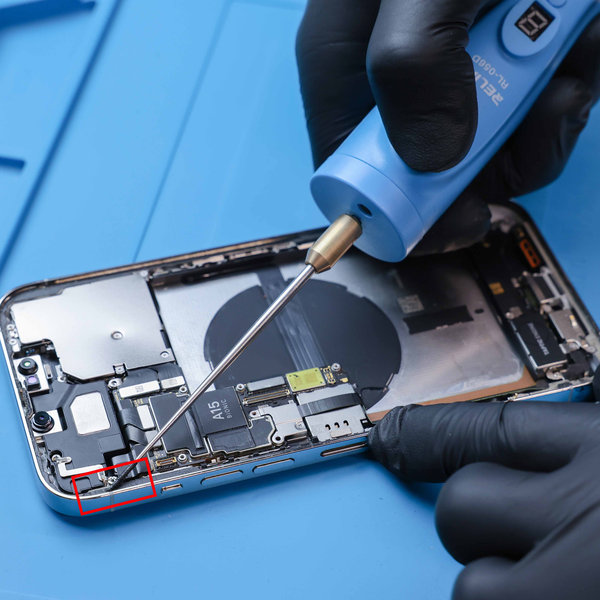
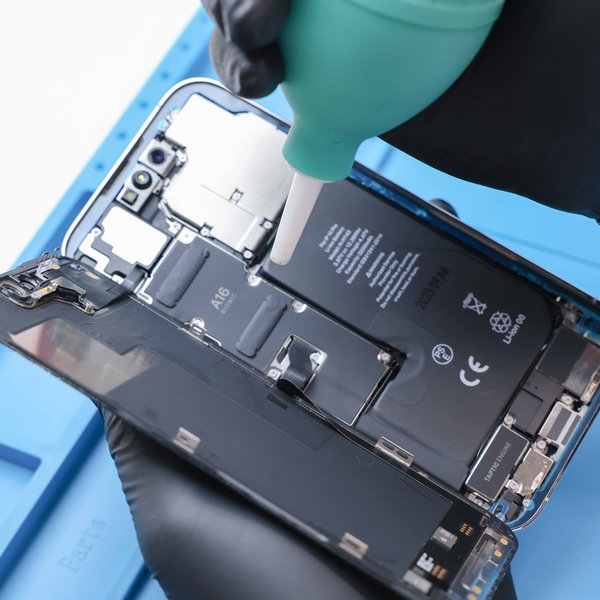
Step 15 Lifting the battery
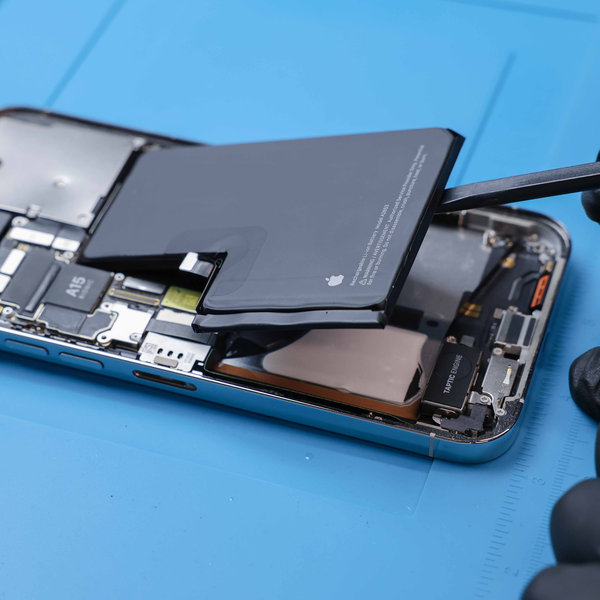
Avoid bending or folding your battery. If the adhesive proves resistant, add a few more drops of isopropyl alcohol and attempt again.
Slide the narrow edge of a spudger or a plastic card between the lower edge of the battery and the frame.
Take care not to scrape the frame beneath the battery - the wireless charging coil is exposed near the center.
Carefully lift the battery until the adhesive completely releases.
Depending on the strength of the adhesive, this process may require patience.
Apply steady pressure for up to a minute to allow the adhesive to loosen.
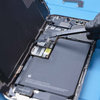
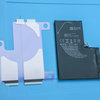
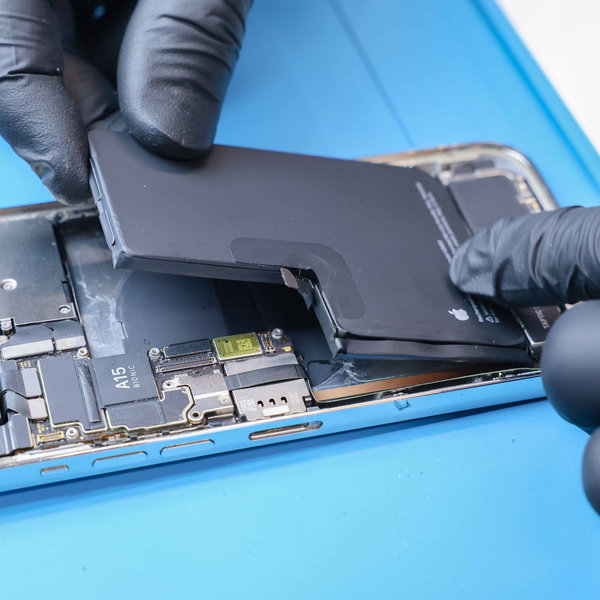
Step 16 Extract the battery
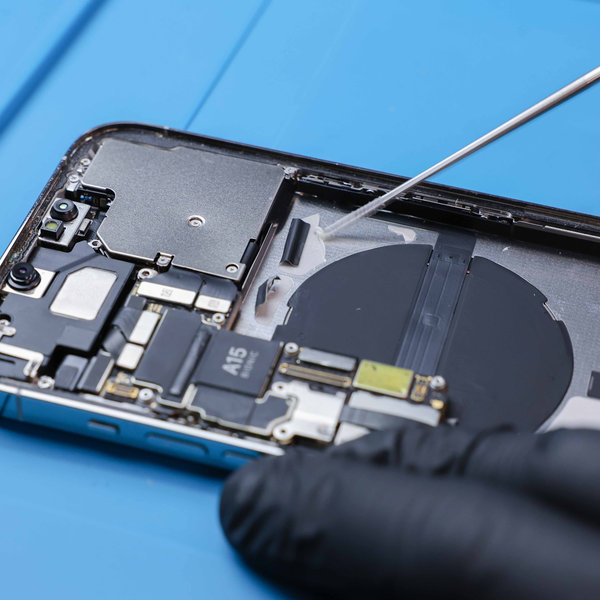

Remove the old battery.
Clean the frame using isopropyl alcohol and a spudger or a lint-free or microfiber cloth.
Before applying adhesive, temporarily reconnect your new battery and position it in place to ensure it fits and the cable reaches the socket on the logic board.
Disconnect the battery afterward.
Step 17 Applying the adhesive strips on new battery
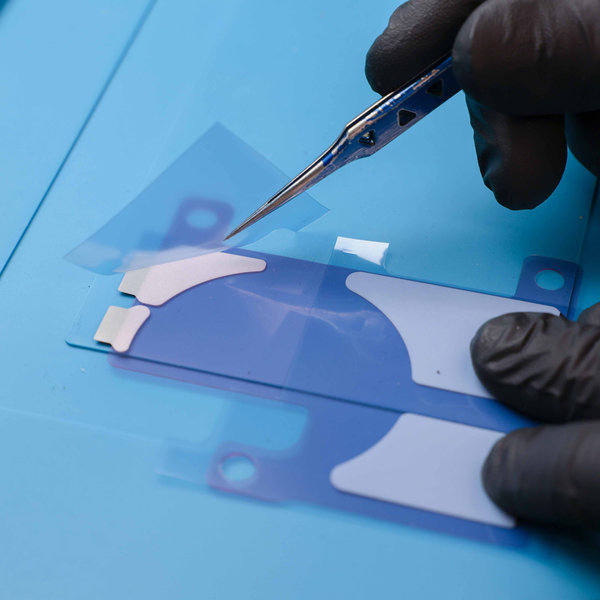

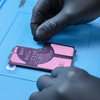
Remove the small sections of blue film covering the flat ends of the new stretch release adhesive strips.
Don't remove the entire blue liner yet.
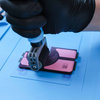
Carefully align the sections with the blue film removed with the top edge of the battery on its front side and gently press them into the place.
Note that these will act as the strips you pulled from the top of the old battery while removing it.
Place the battery on a flat surface and begin removing the rest of the blue film, beginning on the other side of the stretch release adhesive.
Use a pair of Tweezers if you’re having trouble with separating the edge of the blue film from the adhesive.
Gently roll the adhesive onto the surface of the battery over the top edge using your fingertip and lay it flat to the back side of the battery.
Do not pull or stretch the adhesive.
Press the strips firmly, sticking them properly to the back side of the battery.
Next, put the battery back in the phone just like the old one was.
Step 18 Putting the new battery into its compartment
Gently remove the remaining piece of film to fully expose the side of the battery adhesive that sticks to the battery compartment.
Place the battery into its compartment and lightly press it into the device.
Connect the battery cable to its socket on the logic board.
It is advised to test your repair at this point with the new battery in place, while the phone’s rear glass isn’t sealed yet.
Temporarily reconnect all the rear glass components, turn on your phone and make sure it functions without any issues.
Turn it off again, disconnect the rear glass components and continue reassembly.
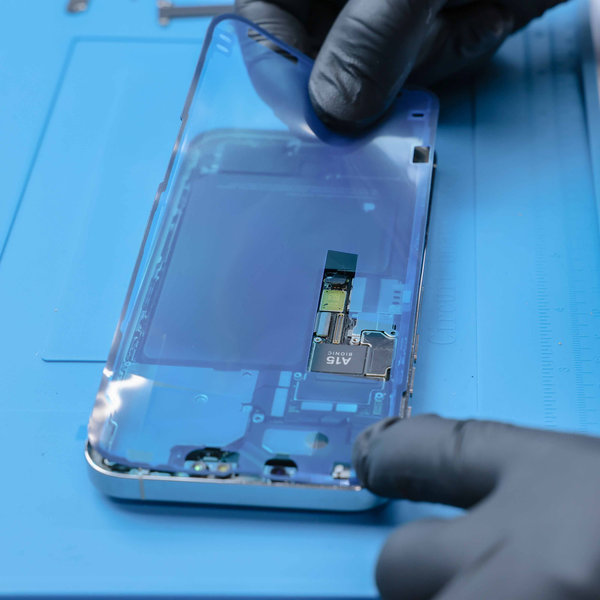
Step 19 Removing old adhesive around the edges of the iPhone
Remove all the old screen adhesive around the perimeter of your iPhone's case using a spudger or tweezers.
Be sure to remove any remaining smaller bits of adhesive with the tip of your spudger
Be careful not to damage any of the spring contacts as you go around the frame.
Step 20 Prepping the surface of the iPhone for the new adhesive
Using a lint-free cloth (or coffee filter) with a bit of isopropyl alcohol, clean the areas of the case and rear display where you removed the old adhesive.
This will help remove any remaining adhesive residue and prep the surface for the new adhesive.
For best results, swipe your cleaning cloth in one direction, not back and forth.
Step 21 Applying new adhesive around the edges of the screen frame


Apply new adhesive around the edges of the iPhone.
Reconnect all the components of the display assembly through a reverse process.
The new adhesive will ensure the iPhone's resistance to water and dust.
Warning: Before placing the new screen on the iPhone, make sure to remove the protective foil.
Be precise while applying the new adhesive. Improper installation could lead to your iPhone not being water-resistant, and there's a higher likelihood of dust or moisture ingress.
Step 22 Reassembling the iPhone


Install the New LCD display and mount the speaker assembly + sensor assembly onto the new LCD display.
Also check the phone for excess screws and small parts that may be stuck in the body of phone and remove them.
When reassembling the iPhone back to its original state, follow these instructions in reverse order from the step 9.
After reassembly, perform a forced restart. This may help prevent any possible issues.

Going Green
We are constantly improving our carbon footprint to protect our planet. Read more about how we are adapting our processes to reduce our footprint.