

Technical difficulty
Duration of the procedure
Number of steps in the tutorial
Necessary spare parts


Replacement tools
Add all
Code: 13940


When replacing the LCD assembly on an iPhone 6S it is necessary to install the old home button into the new assembly, to sure the Touch ID function.
Replacement parts for iPhone 6S can be found in our e-shop offer. If you are interested in a service task for an iPhone 6S, visit one of our branches and we will ensure a same-day repair.
Step 1 Removing Pentalobe screws
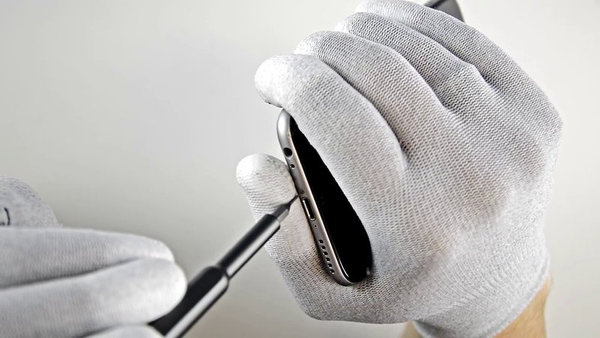
Before disassembling your iPhone discharge the battery under 25%. A charged lithium-ion battery may easily catch fire and explode, if accidentally infringed.
- turn off your iPhone
- remove the two 3,4 mm P2 Pentalobe screws next to the Lightning connector
Step 2 Opening the device
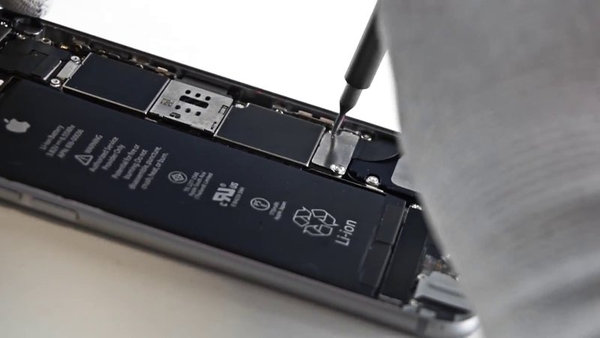
IPhone 6S display is attached to to the device with a thin line of adhesive around edges. If you wish to secure it after the repair, you may purchase it as a replacement part and newly install. If you decide not to replace the adhesive, you should not spot any differences in the functioning of the device.
- press down the suction cup in the bottom left corner of the display. Make sure that it did not cover the Home button
Make sure that the suction cup is fully sucked to the scree and seals well.
- pull the suction cup so that you slightly deviate the end of the front panel from the rare housing
Give yourself enough time and use constant force.
If the display holds firmly, heat it up slightly with a hairdryer, to soften the adhesive.
- use a spudger to gently separate the back housing downwards from the LCD assembly, while you continue pulling the suction cup
- use a plastic spudger to gently move in-between the edge of the LCD assembly and rare housing of the iPhone, while you continue gently pulling the suction cup upwards
- once finished, remove the suction cup from the display
Step 3 Removing the accumulator console screws
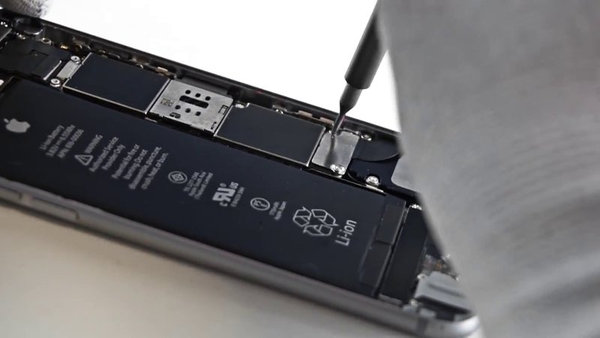
- remove these screws from the ending of the battery connector
- first 2,9 mm screw
- second 2,2 mm screw
Step 4 Disconnecting the metal battery connector holder
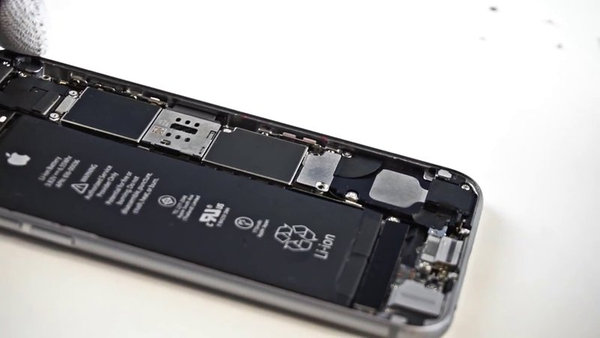
- disconnect the battery holder from the iPhone
Step 5 Disconnecting battery connector
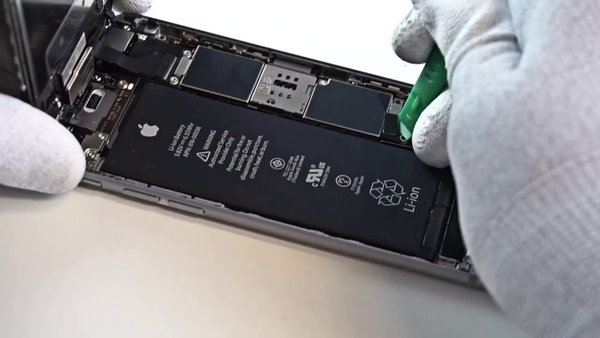
- use a plastic spudger to gently disconnect the battery connector from its socket on the motherboard
Make sure, not to disconnect only the battery connector and ripping out the whole connector on the motherboard.
Step 6 Removing front panel cable bracket from the LCD assembly.
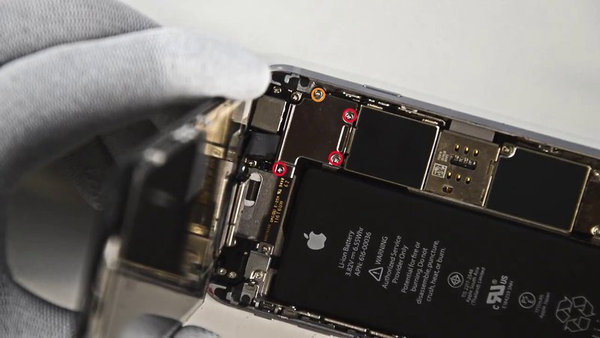
- Remove the following four screws, which secure the front panel cable bracket
- Three 1,2mm screws
- One 2,8 mm screws
Keep track of the screws, as wrong placement during reassembling may cause permanent damage to the motherboard of your iPhone
Step 7 Removing the LCD assembly cable bracket
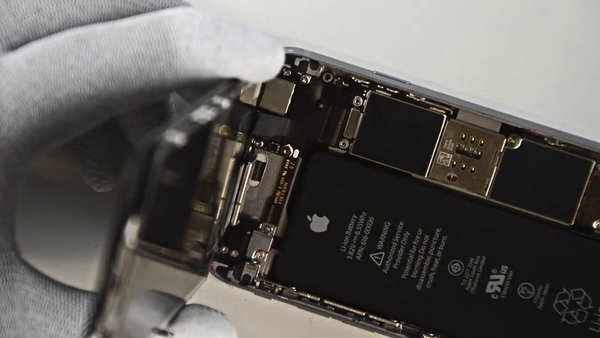
- removing the front panel cable bracket from the motherboard
Step 8 Disconnecting the front-facing camera connector
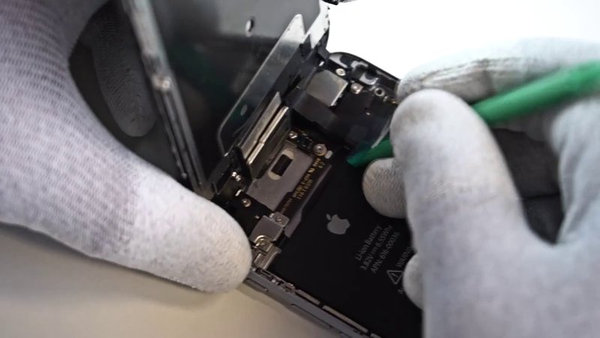
- to disconnect the front-facing camera and sensor cable connector, use a spudger or fingernail
Step 9 Disconnecting the touchscreen connector
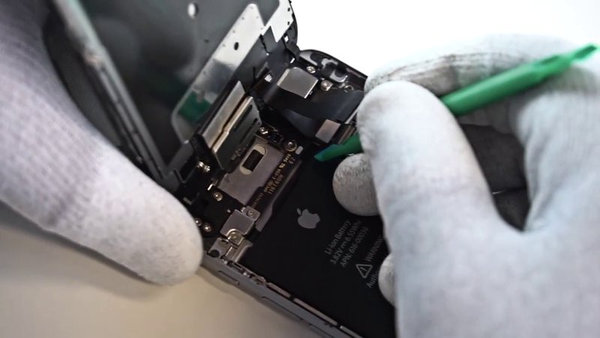
- use the flat end of a spudger to disconnect the touchscreen connector
When re-connecting the touchscreen connector do not press down in the middle. Press one end of the connector and then the other. Pressing down in the middle may bend the component and cause damage to it.
Step 10 Disconnecting LCD cable
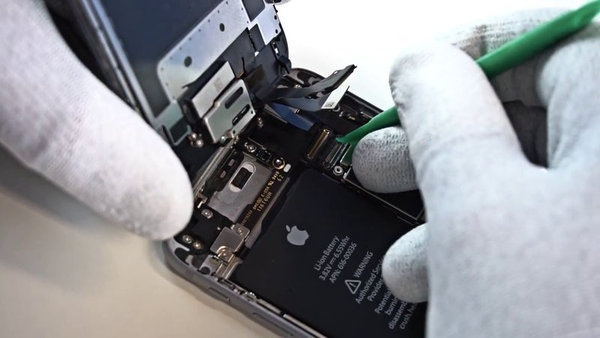
Before disconnecting or re-connecting the cable, make sure that the battery is disconnected
- to disconnect the LCD cable connector, use a spudger or a fingernail
- the display data cable may pop out of the connector while you reassemble your phone
- when turning your phone back on, this may cause white lines or a blank screen. If this happens, simply re-connect the cable
- the best way to get your phone running, is disconnecting and re-connecting the battery connector
Step 11 Separating the LCD assembly from the rare housing.
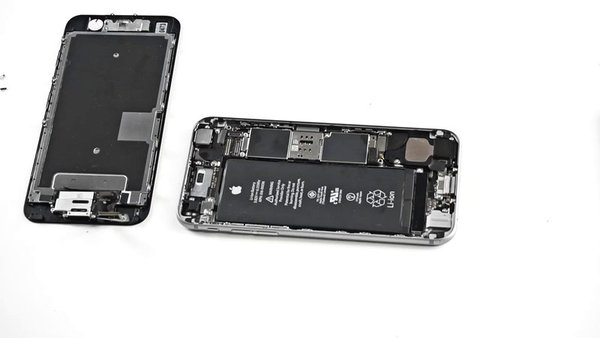
- separate the LCD assembly from the rare housing
Step 12 Disassembling LCD cover
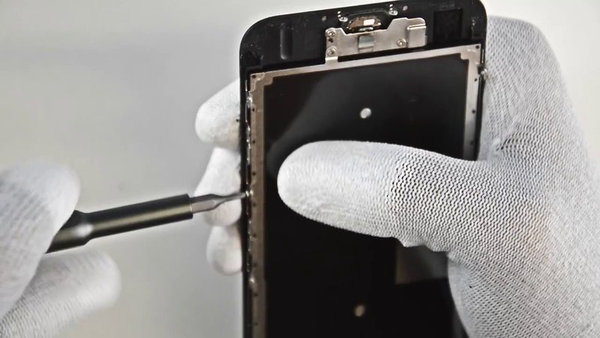
- remove the 9 screws along the perimeter of the LCD cover using a PH000 screwdriver
Step 13 Home Button
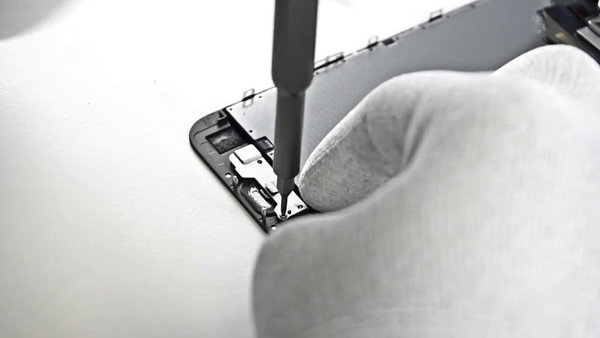
- Remove the 3 x 1,7 mm Phillips screws, which secure the home button bracket in place
- Lift the small piece of the home button bracket, until you spot a small beak
- Eject the cover from the EMI shield and remove it
Step 14 Disconnecting Home button
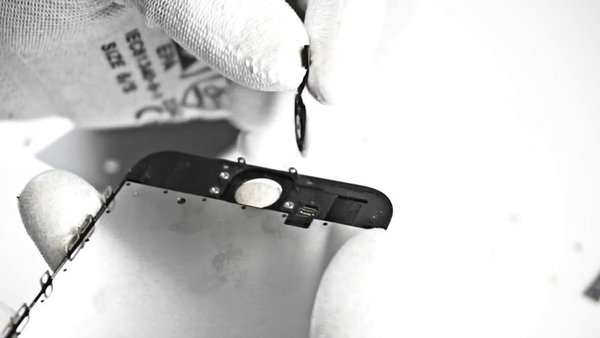
- Use a spudger to disconnect the home button connector from the display panel
- Gently press down the home button from the display side and slowly separate it from the panel
- The rubber edge of the home button is very thin and may easily rip. Separate it therefore gently and slowly, yet smoothly.
- Use the tip of a spudger to separate the home button flex cable from the panel and remove it from it.
Step 15 Disassembling the earpiece speaker cover
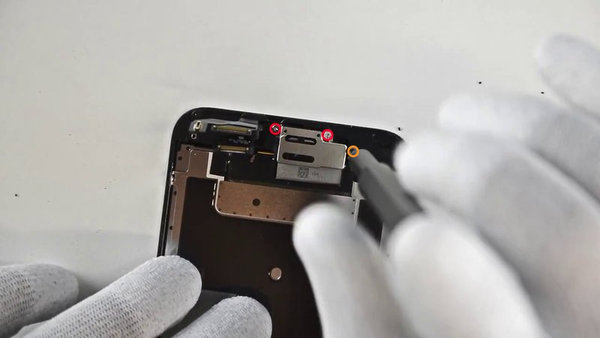
- Remove the 3 Phillips screws from the earpiece speaker cover
- (red) two 2,3 mm screws
- (orange) one 1,3 mm screw
- Remove the earpiece speaker bracket
Step 16 Lift the front-facing camera
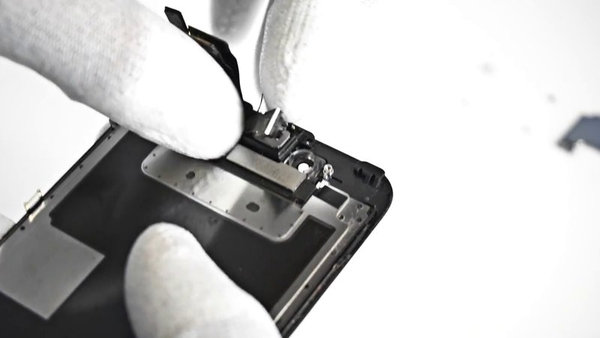
Lift the front-facing camera from its place on the front panel, using the flat end of a spudger
Step 17 Disassembling the earpiece speaker
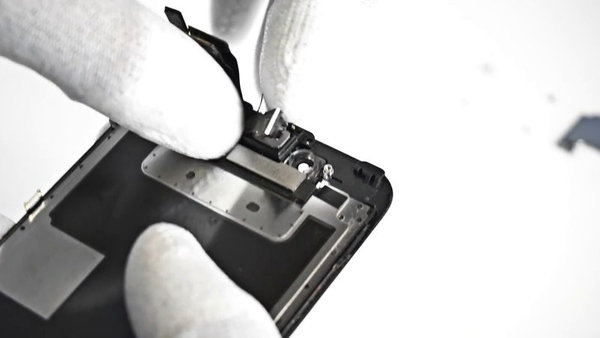
- Keep the front-facing camera on side and remove the damaged speaker from the phone
Step 18 Disassembling the front-facing camera and proximity sensor
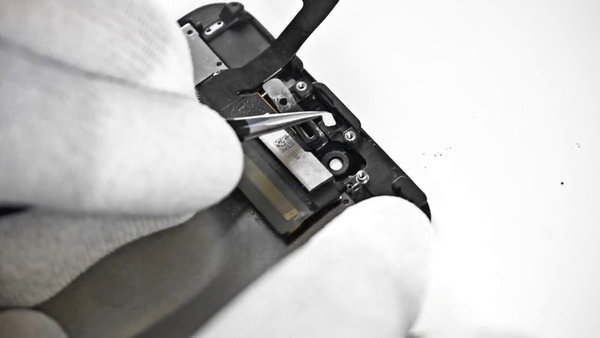
- Slowly unstick the proximity sensor and the front-facing camera. Use tweezers to remove the plastic sensor bracket.
Step 19 Insert a new home button
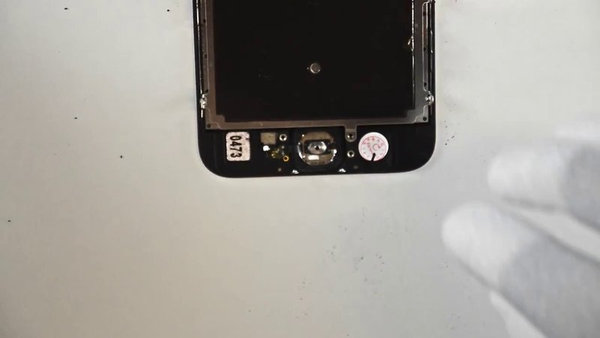
- Insert a home button into the new panel and install it into the device by reversed process.

Going Green
We are constantly improving our carbon footprint to protect our planet. Read more about how we are adapting our processes to reduce our footprint.
